Hello! It has been far too long since I’ve sat down and thought about writing. But no longer! Armed with fresh inspiration, I am back with new recipes and some tried-and-true favorites. Although I’ve continued journalling my kitchen adventures on paper, the lack of scintillating pictures to go along with the text has caused many of the dishes to slip by unrepeated.
I intend to rediscover the purpose of this blog: to chronicle my kitchen feats, so that I may recreate and perfect them, and so that you may also find something tasty to eat.
Without further ado, lets get started!
As it is February, I thought a beautiful little tart would be an excellent way to show those you love that you care (February is the official month of love after all!). This tart, like a good relationship, has sweet and savory elements. However, unlike a good relationship, this tart is hardly any work at all!
 |
| Side by side |
Here we go!
Pear & Brie Tart
For a tart that will serve 4 generously or 6 as an appetizer, collect:
1 sheet of puff pastry, either homemade or store bought (which is what I used).
1 pear, any variety you like, sliced thinly.
At least 1/3 wheel of Brie cheese, but more or less depending on your tastes.
Honey
Directions:
1. Preheat the oven to 425ºF.
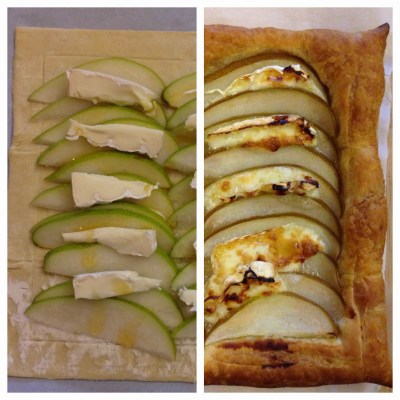
2. Unroll the pastry onto a parchment paper lined baking tray. Gently score a 1/2-1 inch border using the back of a knife – be careful not to go all the way through! This will help the pastry puff up neatly around the pears.
3. Arrange the sliced pears in two rows, slightly overlapping the slices as you go. You will probably have extra pear left after this step.
4. Top the pears with the Brie slices, as the image below shows.
5. Warm the honey for a few seconds in the microwave, then drizzle it across the tart. For this step, be as generous or conservative as you wish; I drizzled a tablespoon or two across my tart.
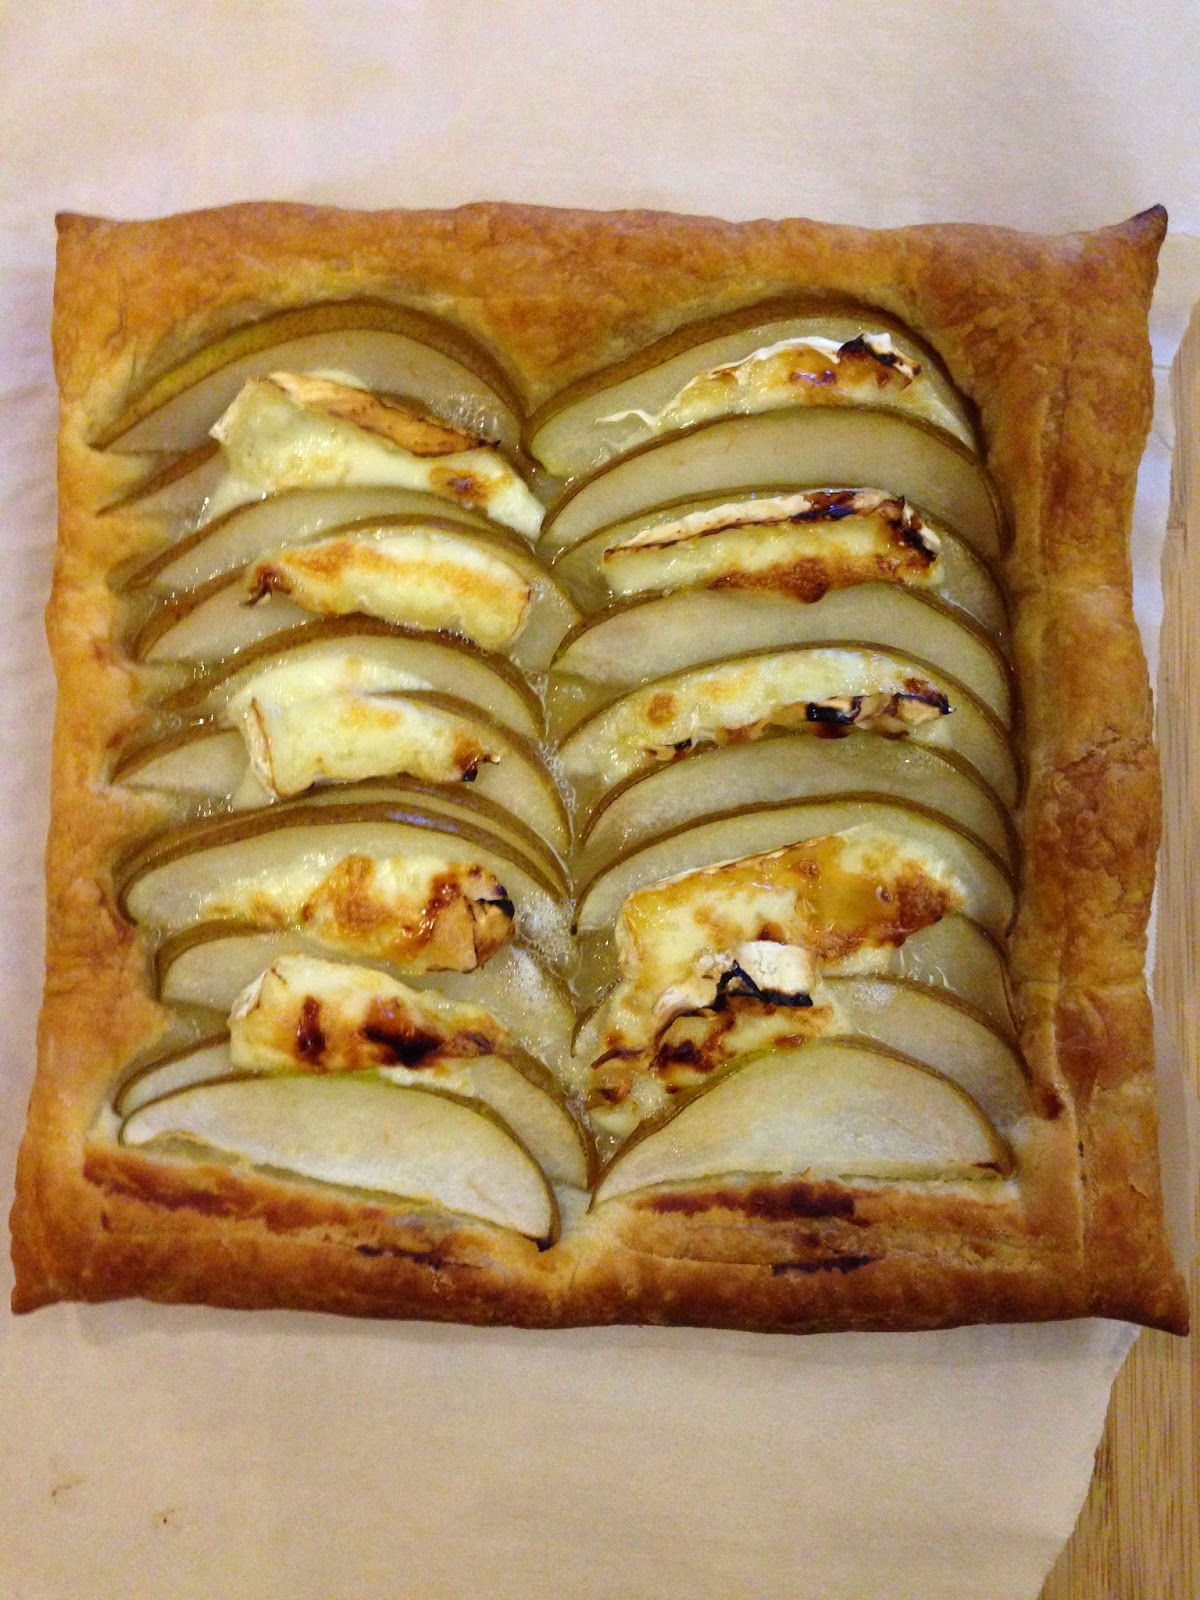
6. Pop the tart into the oven and let it bake for about 15 minutes. Check it at this point to determine doneness: the pastry should be puffed up around the edges and browned, the pears should be softened and the cheese should be bronzed. If none of these criteria are met, let it bake for another 3-5 minutes.
 |
| A gorgeously bronzed tart |
The pears will expel a fair amount of juice as they cook down, so this tart is best eaten cold in the hand, or warm on a plate. To serve, slice it into the desired number of squares.
This tart makes a fabulous appetizer or after-supper treat – try it instead of a cheese and fruit board, or in addition to one. I also loved it for breakfast with a big cup of tea.
A few additions to experiment with:
– Letting the pears soak in brandy/rum or vanilla extract for 30-60 minutes, then patting try before layering. This will bump up the flavor and add something special to the pears.
– Substitute the pears for similar fruits; peaches or nectarines would be stellar! Apples, too, or cherries.
– Substitute the Brie for crumbled goat cheese, camembert, or sharp/white cheddar.
– Toast some almonds, hazelnuts, or pine nuts before lightly crushing and sprinkling on top for serving.
– Preparing the pastry with a flavorful base before topping with the pears, such as jam, pepper jelly, or cinnamon sugar.
– Topping the completed tart with cinnamon, cayenne, or nutmeg before serving.
As you can see, the possibilities are endless! Having a simple tart recipe under your belt is a sure way to impress and satisfy any variety of guests. Even a quiet dinner at home can be made to feel special.
I hope you go out and do some experimenting of your own!


This one looks amazing! Gives me so many ideas I would love to try and makes me miss the summer when we have pear season right in our backyard. 🙂
Brigita
http://www.lostinpattern.com/
LikeLike
I'm so jealous that you have a pear tree! Although I would probably eat myself sick if I had one 😛
LikeLike